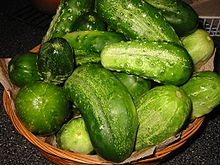
Food, Recipes, Buying & Growing Your Own

Health Benefits of Tomatoes

1ba57ac5-61b5-4e27-b972-b2404475f6cc
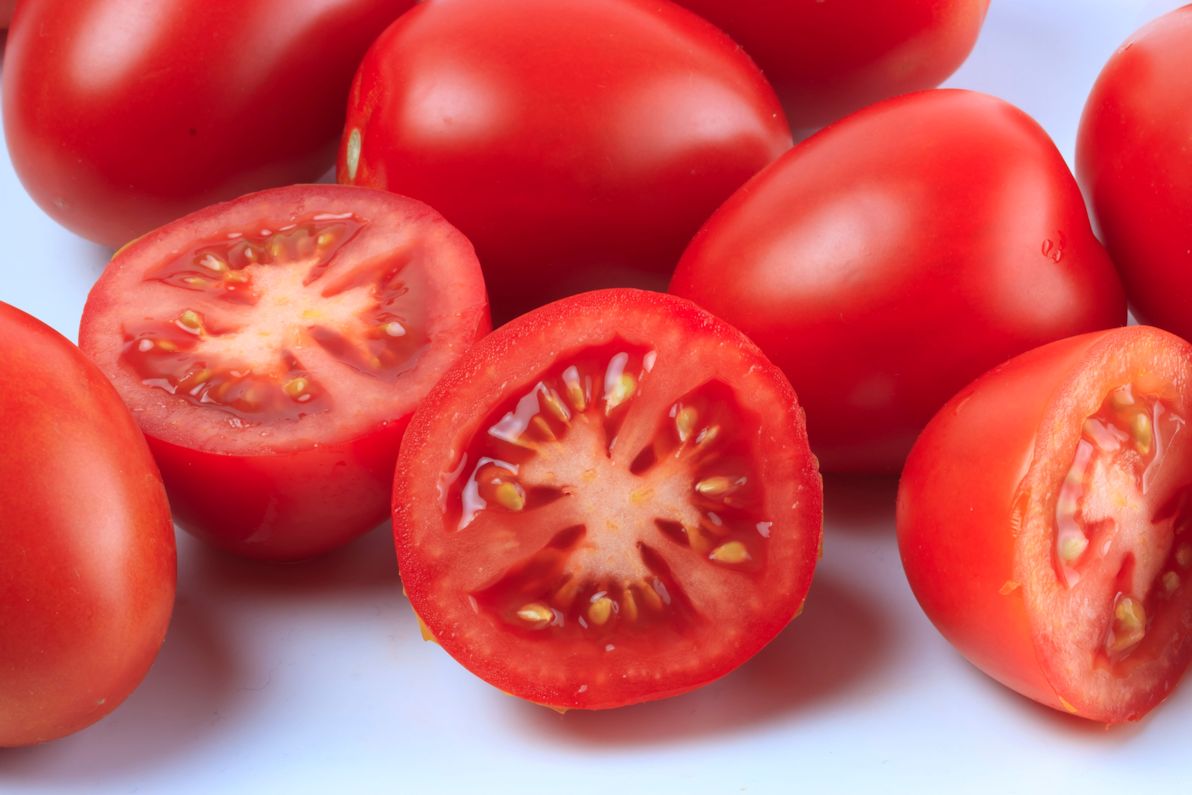
One of the great things about living in this part of the country in the summer is the tomatoes.

Right now, the Hickory and Conover Farmer’s Markets still have local tomatoes plus from farther south. Whether it is the increased acid in a vine-ripened tomato or something peculiar to the soil in this area, most of us live on tomato and mayonnaise sandwiches for a good portion of the summer season. Likewise, summer is really the only time I prefer tomato and lettuce on a cheeseburger to slaw and chili. That’s because homegrown tomatoes are just better tasting.

Tomatoes are full of lycopene, a powerful antioxidant that neutralizes free radicals that cause damage to our cells. The body cannot make lycopene on its own, and although other fruits and vegetables contain lycopene, none have the amounts found in tomatoes. Lycopene is present in all tomatoes, whether they are green (unripe), red, orange or yellow and whether they are fresh, canned, or cooked. Tomatoes can act to protect us from cancer and heart disease.

Research has found that lycopene is especially good at preventing cancers of reproductive and digestive systems, including the prostate, cervix, mouth, esophagus, stomach, colon, and rectum. It also prevents cancer of the larynx, lung, and breast. In experiments, lycopene that was introduced into pre-existing cancer cell cultures prevented the cultures from growing.

Lycopene and other nutrients in tomatoes can also lower cholesterol and thus prevent heart disease. Drinking thirteen ounces of tomato juice a day lowered bad LDL levels by more than twelve percent in one study. Other studies show that ingesting tomatoes and tomato-based products reduces the risk of macular degenerative disease, fights liver toxicity, improves bone density, and dissolves gallstones. Furthermore, the American Medical Association says daily consumption of tomatoes decreases the oxidative stress in type 2 diabetes. A daily glass of tomato juice could keep a person healthy for life.

For more information on the health benefits of tomatoes, including a chart of all the nutrients contained in this amazing fruit, please go to The World’s Healthiest Foods.

Canning Tomatoes

Tomatoes are easy to can and don’t require a lot of expensive equipment. You will need a water bath canner (usually about $30), canning jars, rings, lids, a jar grabber, lid lifter (has a magnet on the end) and a jar funnel. Of course, you need tomatoes (about seven large to a quart), canning salt, lemon juice and water.

The first step is to wash and sterilize the jars, rings and lids. I understand some dishwashers have a sterilize setting, but I always boil the clean jars in the canner and the lids and rings in separate pots for at least ten minutes. This is very important. If these aren’t sterilized sufficiently, your whole batch of tomatoes will spoil. (And talk about a stink!) Leave the jars and lids in the hot water until you are ready to put the tomatoes into them.

While you are heating the jars, boil another large pot of water and prepare a pot or bucket of ice water. Wash your tomatoes, pull off the stems and put them in your stoppered sink. Don’t fill it too full. You can always repeat this step if you have a lot of tomatoes. Pour the boiling water over the tomatoes and after about 30-60 seconds, use tongs to pull out the sink stopper. (Don’t burn yourself!) Immediately pour ice water on top of the tomatoes. It will make the skins slide right off. Peel the tomatoes and cut out any bruised or diseased places.

Fill the jars to within ¼-inch of the top. Press the tomatoes down tight so the juice fills any air pockets. Use a spoon or fork to release any additional air pockets. Add 1 tsp. canning salt and 2 tbs. of lemon juice to each quart jar. Wipe the top of the jar and underside of the ring so they are clean and you get a good seal. Seal the lid on with the ring and boil in the water bath for 45-50 minutes. There needs to be about an inch of water over the tops of the jars in the canner.

Lift the jars out of the water and let them cool overnight without touching them. You’ll hear the lids “pop” as they seal. Once cooled, make sure all the lids are sealed by gently pressing the lid in the center. If it pops up and down, it is not sealed. You can refrigerate the jars that don’t seal and use the contents for a short time. Don’t replace the lid and reprocess the jar; there’s too much chance for botulism. It’s normal for the tomatoes to rise and float above a layer of liquid in the jars. Enjoy vine-ripened, canned tomatoes in all your favorite dishes all year long.

Making Homemade Salsa

Salsa is pretty easy to make. You can vary the ingredients, making it hotter or milder, as you prefer. At about 25 calories per ¼ cup serving, salsa is light, delicious, and good for you. Mix the following ingredients except for the cilantro and refrigerate. Top with the cilantro before serving. The recipe makes about 2 ½ cups.

2 c. tomatoes (some prefer them to be seeded)
¼ c. diced onion
½ tsp. minced garlic
¾ tsp ground cumin
2 tbs. lemon juice
1 jalapeño pepper, seeded and diced
1 banana pepper, seeded and diced
¼ cup diced green mango (optional)
Salt and pepper to taste
¼c. cilantro for garnish

Food, Recipes, Buying & Growing Your Own

August Vegetables: In-Season Favorites

USDA corn
Public Doman USDA

Although corn often gets negative press because of its connection to GMOs in field corn, most local farmers produce sweet corn for eating. Produced on a small scale, most sweet corn varieties are free of GMOS. If you are concerned, ask the grower at the farmers’ market or the produce manager at your grocery.

Fortunately, we’ve had rain in this area. Now is a good time to purchase local vegetables that you can put up for the winter when prices may be higher. You can eat most local sweet corn without worrying about ingesting GMOs.

Corn is one of the easiest vegetables to freeze and retains the flavor nicely. It’s a bit harder to can because you need a pressure canner, but canning can save space if you don’t have room in the freezer.

Another August vegetable that freezes well is squash. The directions are basically the same for any type of summer squash, and then you can use the frozen squash in recipes such as casseroles or breads.

Below are directions for freezing corn and squash and a some of my favorite recipes with these vegetables. Let yourself enjoy healthy local vegetables all year long.

Freezing Corn

  • Start with fresh, local sweet corn and freeze as soon as possible. If you have a delay between picking and freezing, put the corn in the refrigerator or ice it down so the sugars in the kernels won’t start breaking down.
  • Husk the corn and clean as much of the silks from the ears as possible.
  • Place the ears in a large pot of boiling water to blanch. The water should return to a boil within a minute. If it doesn’t, you have too small a pot or too many ears. Blanch for 4-7 minutes.
  • Immerse the corn ears in ice water. Leave them in the ice water as long as you did in the boiling water.
  • If you are freezing ears, put them in freezer bags and mark the date. If you are cutting the corn off the cob, cut to a depth of 2/3 of the kernel for niblets or 1/2 the kernel for creamed corn. For creamed corn, scrape the cob after cutting the kernels. Then bag the kernels and mark the date.

Freezing Squash

  • Choose your squash. Like the corn, put in the refrigerator or in ice water if you have very long to wait between harvest and freezing.
  • After washing, slice your squash into 1/2 inch slices. (Throw the ends away.) Slice enough squash for one blanching at a time so the pieces won’t discolor while waiting.
  • Place the slices in a large pot about 2/3 full of boiling water to blanch. The water should return to a boil within a minute. Blanch for 3 minutes and begin timing as soon as you place the slices in the water. You can use the same water for up to 5 blanchings, just add more water as needed to keep the level to the 2/3 full mark.
  • Remove the blanched slices from the boiling water with a slotted spoon and place in ice water for 5 minutes.
  • Drain the slices thoroughly and place in freezer bags. Mark the date.
  • If you are freezing zucchini for baking, you can grate it instead of slicing. Then use a steam blanch instead of a pot of water. Measure into amounts convenient to your recipe and pack the grated and drained zucchini into bags or in containers, leaving 1/2 inch of space at the top for expansion.

Corn Souffle

  • 2 C. frozen or fresh sweet corn
  • 3 eggs, well beaten
  • 1 c. milk
  • 2 tbsp. butter
  • 1 tsp. salt
  • 2 tsp. sugar
  • 2 tbsp. self-rising flour
  • dash black pepper

Preheat oven to 350. Blend melted butter, flour, salt, pepper and sugar. Gradually stir in milk, and heat to boiling, stirring until mixture thickens and comes to a boil. Let cool slightly, and add corn. Beat egg yolks until light and stir into the corn mixture. Beat egg whites and fold into the corn mixture. Pour into greased 2 quart casserole and bake 30 Minutes. Serves 6. (Thanks to my friend, Nancy Allison, for this recipe.)

Squash Casserole

  • 2 lbs. frozen squash, cooked
  • 1/2 c. melted butter
  • 18 oz. package herb seasoned stuffing mix
  • 1/4 c. chopped onion
  • 2 carrots, grated
  • 1 c. sour cream
  • 1 can cream of chicken soup
  • 2 oz. jar chopped pimentos (optional)

Preheat oven to 350. Cook squash, drain, mash, and set aside. Mix together stuffing mix and melted butter. Pour half of stuffing mixture in bottom of 2 quart flat casserole dish, and set aside. Mix together onion, carrots, sour cream, cream of chicken soup and pimentos. Add mashed squash. Pour on top of stuffing in casserole dish. Top with remaining stuffing. Bake for 30 minutes.