Essential Oils

Tsuga or Hemlock Spruce Essential Oil

Canadian tsuga
Canadian hemlock spruce

Tsuga essential oil comes from the Canadian hemlock spruce tree (or white spruce) and should not be confused with the poisonous hemlock herb (Conium Maculatum) that contains toxic alkaloids and is not a source of essential oil. Rather, this spruce tree is in the pine family and is found primarily in Canada and Idaho. Its properties are similar to pine, and it is the needles and twigs that are used to distill the oil. It has a fresh, somewhat woody scent. It is considered to be non-toxic and is unlikely to irritate.

Tsuga is a wonderful oil for the winter months. Its antimicrobial, antiseptic, and expectorant properties make is a great choice for inhalation when you have coughs, colds, or the flu because it opens the respiratory pathways for better oxygen exchange and breaks up mucus.

You can use a few drops in a cup of boiling water for a quick steam inhalation or dilute a single drop in a teaspoon of honey for a cough remedy. Just be sure you are using pure, therapeutic grade oils that are not already diluted by a carrier oil. Tsuga should also be steam-distilled and not extracted by solvents to be safe for consumption.

Tsuga is also good for digestive disorders and diseases of the mouth, including cold sores and gingivitis. It is also helpful in kidney and bladder infections and is a mild diuretic when taken internally. Use it as an antiseptic for wounds like blisters. It will sting but helps heal the wound quickly. It is even recommended for pimples and acne. You may find it in OTC treatments for sore muscles, or you can use the essential oil neat or diluted as a muscle rub for rheumatism, arthritis, or over-exertion.

Tsuga blends well with a variety of other oils, including pine, cedarwood, and rosemary, as well as lavender, clary sage, and amyris. When using on the skin, be sure to dilute with a carrier oil like jojoba, but use it without a carrier in your diffuser or aromatherapy necklace. I was unable to find specific information about Tsuga and pets, but because it is in the pine family, I would probably avoid using it in a room where I kept my fur baby.

RECIPES

  • Spastic Cough: Mix 10 drops Tsuga, 3 drops Roman Chamomile, and 4 drops Bergamot into 1 ounce carrier oil. Massage into the chest several times daily.
     
  • Pain/Anti-Inflammatory Liniment: Mix 6 drops Helichrysum, 2 drops Tsuga, 2 drops Hyssop, 2 drops Peppermint, 2 drops Juniper, 1 ounce carrier oil. Gently massage into sore tissues and joints.
     
  • Outdoor Fresh Diffuser Blend: Mix 3 drops Tsuga, 3 drops Cedarwood, and 3 drops Balsam Fir into your diffuser tank filled with distilled water. Adjust if necessary for the size of your diffuser.
     
  • Focus-Boosting Diffuser Blend: Add 3 drops each of hemlock spruce oil, rosemary oil, and peppermint oil to your diffuser. Adjust if necessary for the size of your diffuser.
     
Continuing Education, Human energy field, Massage & Bodywork

Unwinding the Meridians

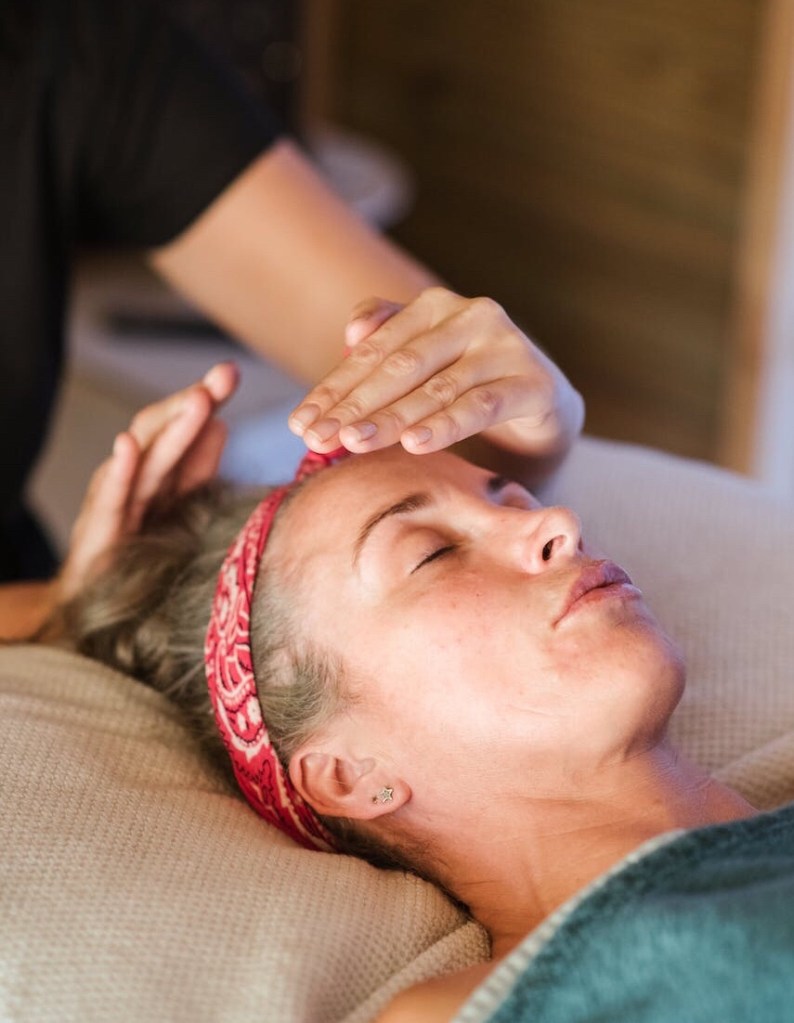
I recently took a new Craniosacral Therapy class from the Upledger Institute on unwinding the meridians. We studied the rudiments of Traditional Chinese Medicine in massage school, and there was a good bit of TCM on the NC Board of Massage and Bodywork Therapy licensing exam, which I took in 2007. (Wow! Have I been doing massage that long?)

We also took Touch for Health Level 1 in massage school as the owner of the now closed Whole You School of Massage and Bodywork, Cheryl Shew, believed it was one of the best classes to prepare us for the massage exam. It is based on TCM and applied kinesiology and is an incredibly effective method for balancing meridians and toning muscles.

After I finished massage school, I took the Levels, 2, 3, and 4 Touch for Health classes, and my teachers, Larry and Arlene Green, offer refreshers and online “get together” frequently. When I began the Unwinding Meridians class, I suspected my TFH books and charts might come in handy, I was right. Much of the material I had previously learned was applicable to the new technique.

I realized I needed to brush up on things though, and it actually got me excited. The more something in the class triggered previous knowledge, the more confident I felt that this is a modality I can use.

So what is it that got me so pumped? Well first of all, I could actually feel the craniosacral rhythm/energy movement when I put my fingers on the acupuncture points. As with traditional craniosacral therapy, the touch is light and less like acupressure or Shiatsu massage.

Before I tried the work on a client, I made sure to look up the acupuncture points for a problem I know she has. I could feel the rhythm shifting and changing even more strongly, maybe because I was working on a real problem. She shared my excitement.

Using craniosacral therapy to unwind the meridians can help with the emotions as well. In Traditional Chinese Medicine, each meridian is associated with organs, emotions, seasons, colors, and a whole wealth of other correspondences. If a client has several points that need to unwind along the same meridian, you can sometime discover old trauma that is the source of chronic pain that seems to have no cause by asking questions related to the meridian correspondences. The inner physician knows and will often lead you to the truth you may be avoiding.

Unwinding the Meridians with Craniosacral Therapy is now a tool in my toolbox. I hope the more that I use it, the better I will get at help clients become pain-free and enjoy life more.

Enneagram

Finding your Enneagram type

One of the most amazing tools I’ve ever found for self-discovery is the Enneagram. Unlike many other personality typing systems, the Enneagram doesn’t just give you a description of your type and then leave you dangling and wondering how you can possibly overcome your fears and hang-ups. Instead, it provides you with a road-map for growth, and it gives you red flags for the times when you are stressed and regressing to former less healthy, fear-based reactions instead of responding with empathy, love and your true nature.

The Enneagram is centuries old. Some date it as far back as the Ancient Greeks, and a more developed theory is found in Sufi mysticism and Christian desert mysticism. Modern teachers such as Don Riso, Russ Hudson, Helen Palmer, David Daniels, and Tom Condon, among others, see it as an elegant psycho-spiritual tool for self-development.

It is better to discover your own Enneagram type than to have yourself typed by someone else. This is because only you can know your true motivations for what you do and what you believe. Motivation is more important to typing than actual behavior.

For example, I may nurse you when you are sick. If I do this out of a sincere desire to help you during a time of difficulty, it is a different motivation than if I do it because I want you to think I am a really good person whom you should depend upon and need so I will feel safe in our relationship. Only I can know why I helped although others probably guess at our true motivations far more often than we give them credit. Indeed, we may need to do a little digging to face our true motivations. Sometimes we don’t want to face our darker inclinations. The Enneagram helps us do that.

There are lots of Enneagram resources on the Internet. The Enneagram Institute, where I was trained, has great examples of each type and tests you can take to help you determine your type.  I’ve also included two handouts to help you explore your Enneagram type.

The first, At_a_Glance, is a two-page PDF that I have used in Enneagram trainings and classes that describes each type in a nutshell. The source is mostly my Enneagram training at the Enneagram Institute with Don Riso and Russ Hudson, but it also has information from other sources, which I have noted at the bottom of the PDF. You will probably see other people in the descriptions at first. You may even find yourself vacillating between two or three possible  descriptions for yourself. If so, look at the descriptions of the numbers before and after. One of those will be your Wing. I am a Four on the Enneagram with a Three Wing. I sometimes think I may be a Six, but I have more Four qualities. Also, I had a Six mother and a Six sister. Four is what works.

The second handout, Chakras and the Enneagram, is taken directly from Mary Horsley’s book, The Enneagram for the Spirit, and is used with permission. It describes how imbalances in each chakra might affect each Enneagram type and which essential oils are most effective in crating balance.

If these handouts tweak your interest, I hope you will spend some time researching the Enneagram. Chances are there are workshops near you.  Learning about your type is fun and informative and can be a tool for spiritual growth.

Essential Oils

Tea Tree Essential Oil

teatreedreamstime_13619429

One of my favorite and most frequently used oils is tea tree oil. It’s been called a first-aid kit in a bottle, and I’ve certainly found it to be true.

The melaleuca alternafloria plant is found in New South Wales, Australia, and it yeilds beautiful flowers like the pink and white ones above. However, it is the leaves that contain the healing oils.

The indigenous Aborigines of the area use the leaves of the plant for healing. One way they do so is to crush the leaves and inhale the odor to relieve coughs and sinus stuffiness. Inhalation is the way I most often use tea tree oil myself although I use the distilled essential oil rather than the leaves.

Another way the Aborigines used the plant was to make an infusion from the leaves, which they drank. In fact, that is how the plant got its name. Captain James Cook observed the natives drinking the infusion and gave the plant the name tea tree. You should avoid drinking the essential oil, however.

Research done in the 1920’s found that essential oil from the melaleuca plant was eleven times more potent than the leading antimicrobial of the time. That means it is still powerful antiseptic, a good thing to know in these days of super-bugs tat are resistant to antibiotics. Plus, tea tree oil doesn’t contain the toxicity of manufactured antiseptics.

Tea tree oil can be used to treat cuts and scrapes, burns, blisters, cankers and cold sores, and a variety of skin conditions such as dandruff, acne, athlete’s foot, and Candidiasis.

It is often found in cleaning solutions such as household cleaners, soaps, hand sanitizers, shampoos, toothpastes and mouthwashes; in antibacterial and antifungal ointments; in baby wipes; and in makeup and skin care products. It has even been used to treat the bacterial and fungal infections of pet fish!

It is good for keeping insects away. It makes a great natural mosquito repellent. One of my clients recommends it for treatment of lice. It is much safer than the OTC remedies, and it works.

One of my favorite uses is in the inhalation oil recipe below. It is relatively inexpensive and is an oil no medicine chest or first-aid kit should be without.

Safety caution: Tea Tree oil is generally used externally. You may need to dilute it with a carrier oil if you have sensitive skin. Furthermore, you should not put it on your pets. If they lick it, it could make them sick. It has been reported to be fatal for cats.

Recipes using tea tree oil

Chief Two-Trees Infusion Oils for Sinus Congestion and Headaches
• 3 drops Eucalyptus EO
• 3 drops Peppermint EO
• 3 drops Tea Tree EO
Boil a cup of water and remove it from the stove. While it is still steaming, add the oils. Immediately cover the cup and head with a towel and inhale for 3 minutes. Keep your eyes closed.

Nail Fungus
• 4 tsps. apple cider vinegar
• 1/8 C. distilled water
• 6 drops tea tree EO
• 10 drops lavender EO
Mix well and apply to nails with a polish brush or cotton. Store in a glass bottle.

Disinfectant/Spray for Mold
• 2 tsps. tea tree EO
• 2 C. distilled water
Put in spray bottle and spray on problem area. Do not rinse.

Skin Care/Vaginal Ointment
• 1 T. aloe vera gel
• 6 drops tea tree
Mix tea tree and aloe vera gel together. Apply to affected area

Essential Oils

Patchouli Essential Oil

leaves mortar and pestleA couple of summers ago, I bought a patchouli plant at Little Green Things in Hildebran. I looked for one this year, but didn’t find it. I love the earthy, sweet aroma of the leaves and was surprised to learn it is a member of the mint family. The plant flowers reluctantly, but even if you don’t get blossoms, you can use some of the fragrant leaves in potpourri and to make sachets to repel moths in my off-season clothes. It smells so much nicer than moth balls.

The essential oil is made from the leaves, which need to be aged before the oil is extracted by steam distillation. Then the oil itself needs to be aged. It thickens, changes color and smells better as it ages.

I first smelled the exotic scent of patchouli in incense, perfumes and soaps, but I’ve started using the essential oil for a variety of other benefits besides just the wonderful aroma.

Patchouli essential oil is good for fungal infections, including athlete’s foot, ringworm, and dandruff, and for bacterial infections. It makes a great-smelling insect repellant and relieves the itching of insect bites. It rejuvenates cells and is thus helpful in healing wounds and scars. It is a good topical remedy for other skin conditions, too. Use it for acne or eczema and for inflamed, cracked, chapped and irritated skin.

Patchouli essential oil helps to reduce anxiety and nervous tension and eases insomnia. Its uplifting fragrance is grounding and provides a connection to the earth that gives us emotional support. Many meditators use it to center and quiet the mind. It is even said to be useful as an aphrodisiac.

Patchouli is often used in essential oil blends. I have a cream that I use and sell in my massage practice from Natural Options Aromatherapy that blends lavender and patchouli. It smells heavenly, and is really relaxing on the table you can get a whole body massage with it for $5 extra, or you can just ask for it for the back or feet as a treat at no extra cost. (You can also buy it for at home use for $16.)

You can make your own patchouli blend using the recipe below. This recipe comes from Aura Cacia and is said to adapt to your own body chemistry to produce a unique personal essence and to be balancing in its effects..

Personal Essence Oil
Ingredients: 10 drops bergamot essential oil; 4 drops rose essential oil; 6 drops patchouli essential oil.
Directions: Mix the base oils in a dark-colored glass bottle. You can vary the aroma with the addition of other oils. Aura Cacia suggests that “the rich, floral aroma can be lightened with the addition of complementary topnotes like lavender or lemon. The rose heart of the essence can be developed into a more complex floral note with the addition of neroli or jasmine. Clove and cinnamon will produce a more spicy fragrance.”

I hope you’ll give patchouli a try. It’s not just for hippies anymore.

Uncategorized

Begin Again

This is a wonderful blog if you are a poetry lover. Refresh your soul by reading it.

Words for the Year

Poetry laid back and played dead until this morning. I wasn’t sad or anything, only restless. ~ Alice Walker

A funny thing happened during my hiatus at the beginning of the year. I began to question my need for written poetry–for words and writing in general–until I had convinced myself that I truly didn’t need it, that it was a luxury . . . a fluffy, cloud-chasing time-consumer that distracted me from living a three-dimensional life. Poetry was to be found in the natural world around me, I rationalized, in the act of living itself. I wanted to see if I could live without the words and, instead, focus on the experience.

I say it was funny, but in reality it was rather sad. What I found–and I see this now in retrospect–was that I grew flatter and more isolated; I was living in “3-D”, but without an outlet…

View original post 668 more words

Food, Recipes, Buying & Growing Your Own

Yummy Pumpkin Recipes

pumpkins
Image courtesy of Pixabay.com. Photographer:  Jill111.

Pumpkins are a versatile food in the squash family. Most people are familiar with their traditional use to make pies, but they are good in just about any recipe you would use sweeter squashes or sweet potatoes.

Canned pumpkin has become seasonal in many supermarkets, so if you like it, you need to stock up during the holidays when canned pumpkin is plentiful and relatively inexpensive. You can also prepare and freeze pumpkins from the patch to use later. Be aware that sometimes the water content and consistency of frozen pumpkin can vary, and you may need to adjust your recipe to accommodate that.

Cooking a Whole Pumpkin in the Oven
Cut your pumpkin in half and scoop out the seeds.
Place the pumpkin halves face down on a cookie sheet or baking dish. Add 1/2″ of water to pan to keep the pumpkin flesh moist.
Bake at 450º for about 45 minutes to an hour or until you can pierce the skin with a fork.
Scoop flesh with a spoon, and drain in a colander. Then place in freezer bags or containers.

Pumpkin Pie
1 3/4 cups pumpkin
1 cup hot water
1 can sweetened condensed milk.
1 egg
1/2 teaspoon ginger
1/2 teaspoon nutmeg
1/2 teaspoon cinnamon
Mix above ingredients and bake in unbaked 9 inch pie shell at 375° for 30 minutes.

Easy (and Delicious) Pumpkin Cake
1 box yellow cake mix
4 beaten eggs
3/4 cup sugar
1/2 cup canola oil
1 cup pumpkin
1/4 cup water
1 teaspoon cinnamon
Dash nutmeg
Mix all ingredients in large bowl until well-blended. Pour batter into greased and floured tube pan. Bake at 350° for 35 minutes.

Spicy Pumpkin Soup
4 tablespoons butter
2 medium onions, chopped
2 teaspoons minced garlic
1/8 to 1/4 teaspoon crushed red pepper
2 teaspoons curry powder
1/2 teaspoon ground coriander
Pinch ground cayenne pepper
3 (15 oz) cans 100 percent pumpkin or 6 cups of chopped roasted pumpkin
5 cups of chicken broth
2 cups of milk
1/2 cup brown sugar
1/2 cup heavy cream
Melt butter and saute onions and garlic until softened, about 4 minutes. Add spices and stir a minute more. Add pumpkin and broth; blend well. Bring to a boil and reduce heat; simmer for 10 to 15 minutes. Puree soup in batches in a blender or food processor until smooth. Return soup to saucepan and low heat. Add brown sugar and slowly add milk then cream while stirring. Adjust seasonings to taste. If too spicy, add more cream to cool it down. Salt to taste. When served, add a dollup of sour cream and sprinkle with toasted pumpkin seeds.

Pumpkin-Gingerbread Trifle
Two 14 ounce packages gingerbread mix, prepared and cooled completely
5 ounce package vanilla cook-and-serve pudding mix
30 ounces canned pumpkin pie filling
1/2 cup brown sugar
1/3 teaspoon ground cinnamon
12 ounces tub Cool Whip
1/2 cup gingersnaps
Prepare pudding and set aside to cool. Stir pumpkin, sugar and cinnamon into the pudding. Crumble one batch or gingerbread into trifle bowl. Pour half the pudding mixture over the gingerbread and layer half the Cool Whip on top. Repeat layers and sprinkle with crushed gingersnaps. Refrigerate overnight.

Food, Recipes, Buying & Growing Your Own

Health Benefits of Tomatoes

1ba57ac5-61b5-4e27-b972-b2404475f6ccOne of the great things about living in this part of the country in the summer is the tomatoes.

Right now, the Hickory and Conover Farmer’s Markets still have local tomatoes plus from farther south. Whether it is the increased acid in a vine-ripened tomato or something peculiar to the soil in this area, most of us live on tomato and mayonnaise sandwiches for a good portion of the summer season. Likewise, summer is really the only time I prefer tomato and lettuce on a cheeseburger to slaw and chili. That’s because homegrown tomatoes are just better tasting.

Tomatoes are full of lycopene, a powerful antioxidant that neutralizes free radicals that cause damage to our cells. The body cannot make lycopene on its own, and although other fruits and vegetables contain lycopene, none have the amounts found in tomatoes. Lycopene is present in all tomatoes, whether they are green (unripe), red, orange or yellow and whether they are fresh, canned, or cooked. Tomatoes can act to protect us from cancer and heart disease.

Research has found that lycopene is especially good at preventing cancers of reproductive and digestive systems, including the prostate, cervix, mouth, esophagus, stomach, colon, and rectum. It also prevents cancer of the larynx, lung, and breast. In experiments, lycopene that was introduced into pre-existing cancer cell cultures prevented the cultures from growing.

Lycopene and other nutrients in tomatoes can also lower cholesterol and thus prevent heart disease. Drinking thirteen ounces of tomato juice a day lowered bad LDL levels by more than twelve percent in one study. Other studies show that ingesting tomatoes and tomato-based products reduces the risk of macular degenerative disease, fights liver toxicity, improves bone density, and dissolves gallstones. Furthermore, the American Medical Association says daily consumption of tomatoes decreases the oxidative stress in type 2 diabetes. A daily glass of tomato juice could keep a person healthy for life.

For more information on the health benefits of tomatoes, including a chart of all the nutrients contained in this amazing fruit, please go to The World’s Healthiest Foods.

Canning Tomatoes

Tomatoes are easy to can and don’t require a lot of expensive equipment. You will need a water bath canner (usually about $30), canning jars, rings, lids, a jar grabber, lid lifter (has a magnet on the end) and a jar funnel. Of course, you need tomatoes (about seven large to a quart), canning salt, lemon juice and water.

The first step is to wash and sterilize the jars, rings and lids. I understand some dishwashers have a sterilize setting, but I always boil the clean jars in the canner and the lids and rings in separate pots for at least ten minutes. This is very important. If these aren’t sterilized sufficiently, your whole batch of tomatoes will spoil. (And talk about a stink!) Leave the jars and lids in the hot water until you are ready to put the tomatoes into them.

While you are heating the jars, boil another large pot of water and prepare a pot or bucket of ice water. Wash your tomatoes, pull off the stems and put them in your stoppered sink. Don’t fill it too full. You can always repeat this step if you have a lot of tomatoes. Pour the boiling water over the tomatoes and after about 30-60 seconds, use tongs to pull out the sink stopper. (Don’t burn yourself!) Immediately pour ice water on top of the tomatoes. It will make the skins slide right off. Peel the tomatoes and cut out any bruised or diseased places.

Fill the jars to within ¼-inch of the top. Press the tomatoes down tight so the juice fills any air pockets. Use a spoon or fork to release any additional air pockets. Add 1 tsp. canning salt and 2 tbs. of lemon juice to each quart jar. Wipe the top of the jar and underside of the ring so they are clean and you get a good seal. Seal the lid on with the ring and boil in the water bath for 45-50 minutes. There needs to be about an inch of water over the tops of the jars in the canner.

Lift the jars out of the water and let them cool overnight without touching them. You’ll hear the lids “pop” as they seal. Once cooled, make sure all the lids are sealed by gently pressing the lid in the center. If it pops up and down, it is not sealed. You can refrigerate the jars that don’t seal and use the contents for a short time. Don’t replace the lid and reprocess the jar; there’s too much chance for botulism. It’s normal for the tomatoes to rise and float above a layer of liquid in the jars. Enjoy vine-ripened, canned tomatoes in all your favorite dishes all year long.

Making Homemade Salsa

Salsa is pretty easy to make. You can vary the ingredients, making it hotter or milder, as you prefer. At about 25 calories per ¼ cup serving, salsa is light, delicious, and good for you. Mix the following ingredients except for the cilantro and refrigerate. Top with the cilantro before serving. The recipe makes about 2 ½ cups.

2 c. tomatoes (some prefer them to be seeded)
¼ c. diced onion
½ tsp. minced garlic
¾ tsp ground cumin
2 tbs. lemon juice
1 jalapeño pepper, seeded and diced
1 banana pepper, seeded and diced
¼ cup diced green mango (optional)
Salt and pepper to taste
¼c. cilantro for garnish

Food, Recipes, Buying & Growing Your Own

August Vegetables: In-Season Favorites

USDA corn
Public Doman USDA

Although corn often gets negative press because of its connection to GMOs in field corn, most local farmers produce sweet corn for eating. Produced on a small scale, most sweet corn varieties are free of GMOS. If you are concerned, ask the grower at the farmers’ market or the produce manager at your grocery.

Fortunately, we’ve had rain in this area. Now is a good time to purchase local vegetables that you can put up for the winter when prices may be higher. You can eat most local sweet corn without worrying about ingesting GMOs.

Corn is one of the easiest vegetables to freeze and retains the flavor nicely. It’s a bit harder to can because you need a pressure canner, but canning can save space if you don’t have room in the freezer.

Another August vegetable that freezes well is squash. The directions are basically the same for any type of summer squash, and then you can use the frozen squash in recipes such as casseroles or breads.

Below are directions for freezing corn and squash and a some of my favorite recipes with these vegetables. Let yourself enjoy healthy local vegetables all year long.

Freezing Corn

  • Start with fresh, local sweet corn and freeze as soon as possible. If you have a delay between picking and freezing, put the corn in the refrigerator or ice it down so the sugars in the kernels won’t start breaking down.
  • Husk the corn and clean as much of the silks from the ears as possible.
  • Place the ears in a large pot of boiling water to blanch. The water should return to a boil within a minute. If it doesn’t, you have too small a pot or too many ears. Blanch for 4-7 minutes.
  • Immerse the corn ears in ice water. Leave them in the ice water as long as you did in the boiling water.
  • If you are freezing ears, put them in freezer bags and mark the date. If you are cutting the corn off the cob, cut to a depth of 2/3 of the kernel for niblets or 1/2 the kernel for creamed corn. For creamed corn, scrape the cob after cutting the kernels. Then bag the kernels and mark the date.

Freezing Squash

  • Choose your squash. Like the corn, put in the refrigerator or in ice water if you have very long to wait between harvest and freezing.
  • After washing, slice your squash into 1/2 inch slices. (Throw the ends away.) Slice enough squash for one blanching at a time so the pieces won’t discolor while waiting.
  • Place the slices in a large pot about 2/3 full of boiling water to blanch. The water should return to a boil within a minute. Blanch for 3 minutes and begin timing as soon as you place the slices in the water. You can use the same water for up to 5 blanchings, just add more water as needed to keep the level to the 2/3 full mark.
  • Remove the blanched slices from the boiling water with a slotted spoon and place in ice water for 5 minutes.
  • Drain the slices thoroughly and place in freezer bags. Mark the date.
  • If you are freezing zucchini for baking, you can grate it instead of slicing. Then use a steam blanch instead of a pot of water. Measure into amounts convenient to your recipe and pack the grated and drained zucchini into bags or in containers, leaving 1/2 inch of space at the top for expansion.

Corn Souffle

  • 2 C. frozen or fresh sweet corn
  • 3 eggs, well beaten
  • 1 c. milk
  • 2 tbsp. butter
  • 1 tsp. salt
  • 2 tsp. sugar
  • 2 tbsp. self-rising flour
  • dash black pepper

Preheat oven to 350. Blend melted butter, flour, salt, pepper and sugar. Gradually stir in milk, and heat to boiling, stirring until mixture thickens and comes to a boil. Let cool slightly, and add corn. Beat egg yolks until light and stir into the corn mixture. Beat egg whites and fold into the corn mixture. Pour into greased 2 quart casserole and bake 30 Minutes. Serves 6. (Thanks to my friend, Nancy Allison, for this recipe.)

Squash Casserole

  • 2 lbs. frozen squash, cooked
  • 1/2 c. melted butter
  • 18 oz. package herb seasoned stuffing mix
  • 1/4 c. chopped onion
  • 2 carrots, grated
  • 1 c. sour cream
  • 1 can cream of chicken soup
  • 2 oz. jar chopped pimentos (optional)

Preheat oven to 350. Cook squash, drain, mash, and set aside. Mix together stuffing mix and melted butter. Pour half of stuffing mixture in bottom of 2 quart flat casserole dish, and set aside. Mix together onion, carrots, sour cream, cream of chicken soup and pimentos. Add mashed squash. Pour on top of stuffing in casserole dish. Top with remaining stuffing. Bake for 30 minutes.


Uncategorized

Tennis Ball Techniques for Reducing Pain

If you have visited my massage office and complained of a stiff neck, sciatic pain, or low back pain, chances are I told you to use tennis balls to work on the area when you got home from the massage. Tennis balls are my favorite self-care massage tool.

You don’t need expensive tennis balls like you use on the court. You can buy three for a dollar in the pet section of most discount stores like Dollar General or Dollar Tree. If you put a couple in a sock or the leg of an old pantyhose, you can create a second tool that allows you to get to many hard-to-reach places as well.

When you add some stretches to your self-care treatment, you can often relieve pain between massage visits. Indeed, it sometimes may seem that a massage wakes up latent trigger points. While the therapist hopes she has released all your knots, sometimes an area hurts worse after the massage as the body adjusts and realigns itself. A tennis ball on the area can finish releasing any of the “knots” that just don’t want to go away.

Just like the pressure applied in a neuromuscular therapy session, the tennis ball forces blood, lymph and toxins out of the muscle tissue. When the ball is removed and the blood rushes back, the tissue is flooded with oxygen and nutrients, and the tone of the muscle is reset. If you follow the trigger point treatment with stretching, you can often induce the muscle to keep its tone permanently.

Piriformis Release

The piriformis attaches on one end to the sacrum and on the other to the head of the leg bone at the hip socket. When it gets tight, it can cause back pain, hip pain, or leg pain. Leg pain is especially likely if the tight muscle entraps the sciatic nerve.

tennisball1

Place the tennis ball in the center of the fleshy part of your gluteals. Roll it around until you find the sore area, and situate the ball there. Relax into the ball allowing gravity to assist you in the release. Breath deeply until you can no longer feel the soreness. Move to a new sore spot an repeat until the muscle is relaxed, then repeat on the other side. Afterwards while still lying on your back, stretch the muscles by placing the ankle of one leg just above the knee of the other (like you are crossing your leg) and pulling the lower knee toward your chest. Repeat on the other side.

I also do a variation of this by lying on my side with my lower leg straight and my top leg bent and crossed over the lower leg so that my upper buttocks are rotated forward. Then I can easily reach the piriformis with my hand holding the ball. I can press and roll the ball until the trigger points are released. I do this in bed rather than on the floor.

Occiput Release

One of the most common complaints is stiff neck or headache pain. The occiput releasetennisball2 allows the skull to release any jamming from the spine. The release can cause deep relaxation and improved movement.

Massage therapists usually use their fingers to create the release, but tennis balls are a great way to get a similar result at home. Putting two in a sock and then lying on them is the best way. Be sure they are positioned at the bottom of the protrusions at the back of the skull on both right and left. Relax into the release for up to five minutes. Follow up with neck stretches front, back, and side to side.

Adductor Release

tennisball4_1The inside of the thigh from pubic bone to various intervals along the femur is the site of the adductors. The job of the adductors is to stabilize the hip joint and move the leg toward the midline of the body. When these muscles have trigger points, pain can be felt along the top of the thigh and down the inside of the leg to just above the ankle. They may be the
culprits in medial knee pain.

To release the adductors, drape a folded blanket or towel along the front edges of a straight-backed chair with a hard seat to act as a cushion. Sit forward on the chair, and spread your legs. To release the right adductors, hold the tennis ball in the left hand and place the back of the left hand on the right side edge of the chair. Lean your body to the left and place your right thigh over the tennis ball. Begin at the groin and work your way down the inner leg, holding the points that are painful until you feel the release. Stop just above the knee. Repeat on the other side if necessary. Do lunges to further stretch the released adductors.

Conclusion

Tennis balls have long been used by dancers and athletes for self-care. Yoga instructors frequently suggest them to help their students care for injuries and achieve deeper poses. make them part of your self-care practice.